Chemistry

In 9th grade in high school, my "home" teacher was our chemistry teacher. I can't remember her name, but I can clearly see this short and plump lady cheerfully rolling into the classroom with absolutely no desire to teach chemistry to the just-as-disinterested students in the room. We were bored with anything school related. She, on the other hand, was on a mission. A nationally ranked bridge player, our chemistry teacher had only one thing in mind--to turn all her students into bridge enthusiasts. Her project was a total success. By the middle of the school year, my classmates skipped recess and free (and not so free) periods, moved around tables and, arranged into groups of four, hovered completely absorbed over their sets of cards. I never took to bridge. I did not learn the game, nor did I learn any chemistry. 

I've always worked in community studios, where the staff is responsible for glazes, so I have limited experience with anything glaze related except the actual dipping of the pot into the glaze bucket. The chemistry of glazes, the process of mixing glazes, testing glazes to achieve specific characteristics, and manipulating glaze responses to various firing environments -- about all these, I gathered over the years bits of information here and there. Glazes that have iron do this...Glazes that have cobalt do that...I wish I could say that I have developed a systematic understanding of the characteristics of the glazes in the studio, so I could use them effectively and creatively. Really, I can barely remember the names of the elements (bridge vs. high school chemistry...)

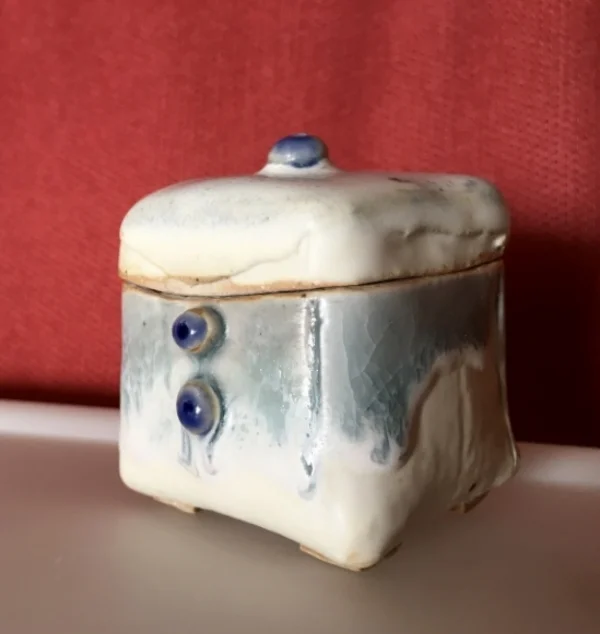
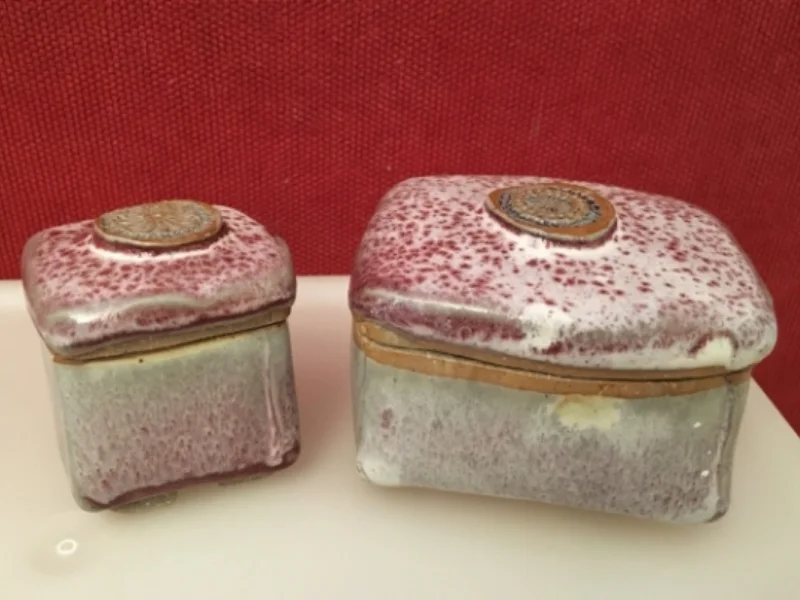
I like these boxes. The blue and white glazes created a fluid surface and the red a white resulted in a pretty cool speckled surface. What happened here?

People in the studio (Hyde Park Art Center) are always gathering near the shelves where pieces fresh from the kiln are placed. Everyone is excited not only to see their own work, but also all the other glazed pieces. "Oh, look at this one. This is gorgeous, What glaze is it here?.." "This glaze came out very differently from last time..." and so on. People are generous in sharing the combinations they used and there is a communal expansion of our familiarity with the glazes we have in the buckets at the studio--how they work in combinations, the successful and what we should avoid. 

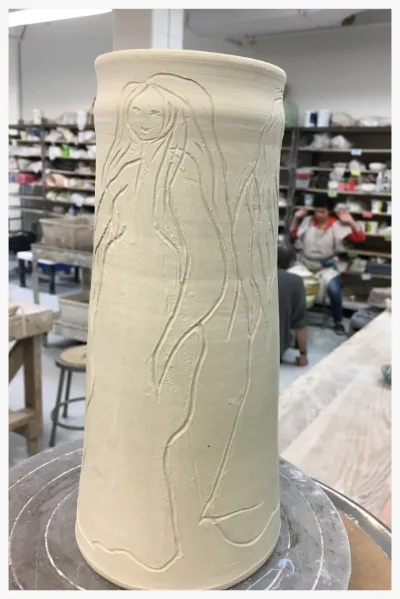
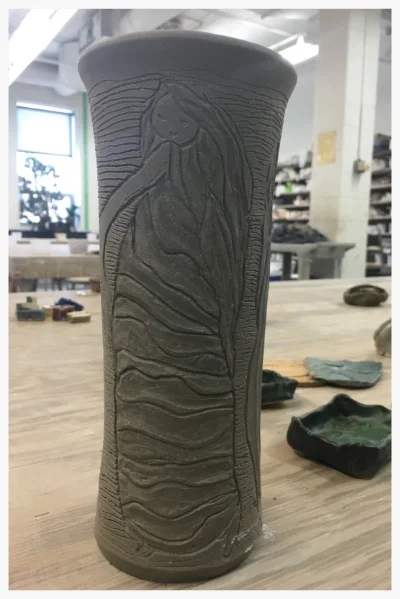
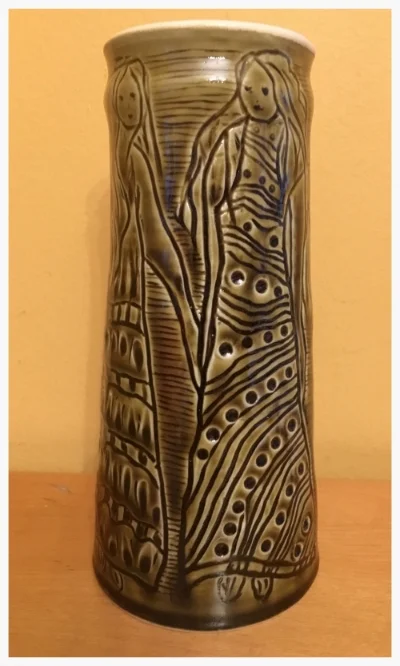
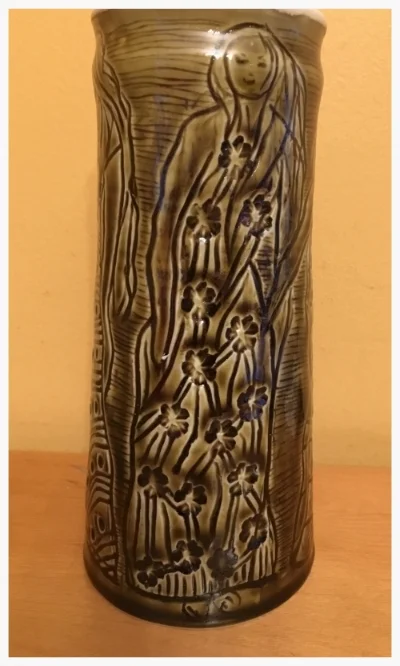
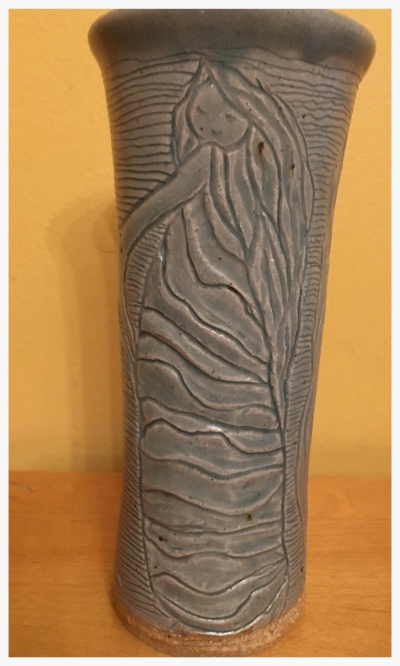
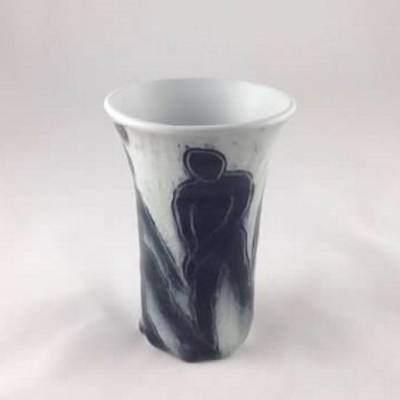
In the two boxes in the pitcures I put a matte white glaze (called Mammo White) over a shiny glaze that tends "to run". Runny glazes are the enemy of the kiln shelf and studio budget. Kiln shelves are expensive and runny glazes melt down the sides of pottery until they stick to shelves and ruin them. Runny glazes have to be used carefully. The blue and red glazes I used for these boxes have harmed many kiln shelves....The white matte glaze is not runny. It is actually very stable. It turns out, as we collectively discovered in our studio, that a combination of the stable white and any of the runny glazes creates a fluid and speckled surface, as if the white is fighting the shiny, pushing up against its tendency to flow down toward the shelf. The opposing forces of the glazes produce beautiful results.  In the vase below, on the other hand, I used a runny glaze alone over the white vase decorated with black slip (a paste of colored clay). There was no opposing force, and the glaze reached the shelf (see the glaze bump on the bottom). I should have known better...

Chemistry -- So it is time for me to begin learning about glazes.  Glazes are made of four basic parts.  Silica is found in the earth and it can turn into glass if heated to 3100 degrees F. That is very high temperature--even ceramic kilns don't get so hot. Then there is a flux material that lowers the melting point of silica, allowing it to turn into a glaze (or glass). There are many flux materials and each behaves differently in the glazing process. It is good to know how various fluxes relate to characteristics of different glazes. The third component is a refractory -- a material that remains strong even in high temperatures and stiffens the glaze, helping it stick to the pot, rather than run down with gravity and ending up on the kiln shelf. Finally, there are materials that give the glaze its color--usually these are metallic oxides and other variations, such as transparent vs. opaque. The interaction between the four components influences the appearance and feel of the glaze. Other factors are also at play--the kiln environment, the chemical composition of the clay body--but clearly it makes sense to know more how the very basic ingredients of glaze interact. I'm on it. 


Results

Coming back to regular work at the studio after a few months break is great but can also be a little frustrating. At first, it feels as if ideas are just not coming and that I'm basically recycling shapes and images I have done before. I make a few mugs, a couple of covered jars, some boxes (always pleasing and relaxing)....finally after a couple of weeks, I feel that my hands and mind are getting into sync again. I challenge myself to throw a little higher; straight but not too narrow, and gravitate toward elongated figures. Not the dynamic, sometimes even contorted figures I've done in the past, but rather still, long and stable. 

I was pretty happy with the work in progress. The white jar (porcelain) is shown here in a very early stage of development, just the initial rough sketch. When the clay is dry enough not to collapse from touch but not so dry that it is impossible to carve into it (it is called the "leather hard" stage), I use a wooden tool that looks like a pencil and make lightly rough sketches. Once I'm more or less happy with the ideas and composition, I use various tools to create the full carving. This is what you can see on the darker jar (grey stoneware).

These carved jars went through the initial bisque firing, and then it was time for glazing. With carved decorations like these, I like using glazes whose colors vary based on thickness. So where the glaze is thick because it is filling a carved space, it might come out much darker or significantly lighter than where it is covering the surface in a thin layer. 

The results did not come out as I expected.  

The green glaze on the white porcelain came out a little too intense and dark. The figures are clearly outlined, but I imagined a softer, dreamier look. What happened? Who knows--the glaze may have been a little too thick or maybe I applied too much of it. Possibly it has to do with the atmosphere in the kiln, or the location of the jar in it....as I said, who knows. There are never guaranteed results in ceramics. The other jar--I hoped for a deeper blue and sharper contrasts over the carved surface. This one came out very quiet, melancholy...it is true that I made it during a particularly rainy week.

The point is that every piece is ultimately a surprise. Many factors influence the final result. I have learned not to be too attached to any piece and certainly not to the image of it I have in my head during the various stages of its development. When I see the finished piece coming out of the kiln, I try to suspend judgement. Now that it is done, the work is its own and it will show me and anyone else looking what it has to offer. 


So here is the next one in the making. Here I painted the jar blue, carved into it (so you see the white clay under), and added some black and blue highlights. Now it is time to wait and see what comes out of the kiln.....

A Little Introduction

Winter of .... Every day, on my way to University, I walk by this little storefront--The Pot Shop--Classes available, all levels welcome. I have a distant memory from my childhood. I must have been about 5 or 6. I'm in the yard making plates and cups out of mud, believing with all my heart that they would dry and harden, and become a real toy tea-set. How do I want to play with mud again! 

I start taking classes. Two things happen. I make a final decision to leave the graduate program I'm attending, and I discover that I absolutely love doing pottery. What's next? -- I do not leave a promising academic career to become a professional potter--I develop a new career in education and health promotion--but I also continue developing my skills in ceramics.

In the beginning, I mostly produce thick-walled and poorly shaped pots. To cover up these beginner's flaws and to  make my work nonetheless attractive, I begin carving and painting the surfaces of the jars, cups, and bowls I make.

Soon enough, however, I develop a true and real love for surface decorating. I begin to explore decorative techniques and traditions, and work on integrating shape and surface. Can the pot itself dictate the style and motif of its outward facet? I'm still working on this, and in this site, you can see some of the solutions I have developed. 

In recent years, I've been doing ceramics at the Hyde Park Art Center. I am very lucky to be living only about a block away. I am also very lucky because HPAC is generous with the studio time it allows it's members, and because there are many wonderful people in the Ceramics studio, who enjoy, just like I do, talking about ceramics and sharing ideas and techniques. Let me know if you want to come visit. 

I hope you will visit my site occasionally to look at what's new in the gallery and blog. I'd love to answer your questions or have a dialogue about crafts, art, and creativity. 

Thank you for reading, Orit